 English
 Español
Continuing with the series Crochet for Beginners now is time for the second part, how to make your slip knot. This step is very important because almost every crochet project (with some exceptions like amigurumis) begins with this technique.
How to Make a Slip Knot
I have a few notes to share with you before starting with the slip knot.
- This post will show you one way to make the slip knot, but you can find a LOT of versions of the same on the internet. I chose this one because, for me, it is the easiest one.
- Even though the slip knot is the “right way” to start a crochet project, no all the people use it. Some people just knot the yarn to the crochet, and others (like me) use a strange technique learned from their moms or grannies. If a loved one or someone taught you a different way, it’s ok! Don’t worry.
- I know right now you don’t know how to count stitches, but please remember the slip knot is NOT counted like a crochet stitch. Never.
- Conquer this technique is like always: practice. Don’t be frustrated and be patient with yourself.
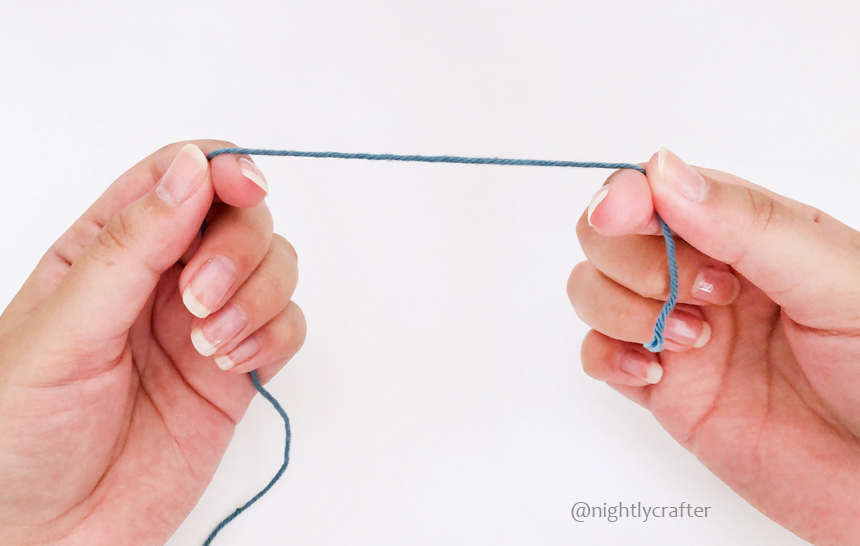
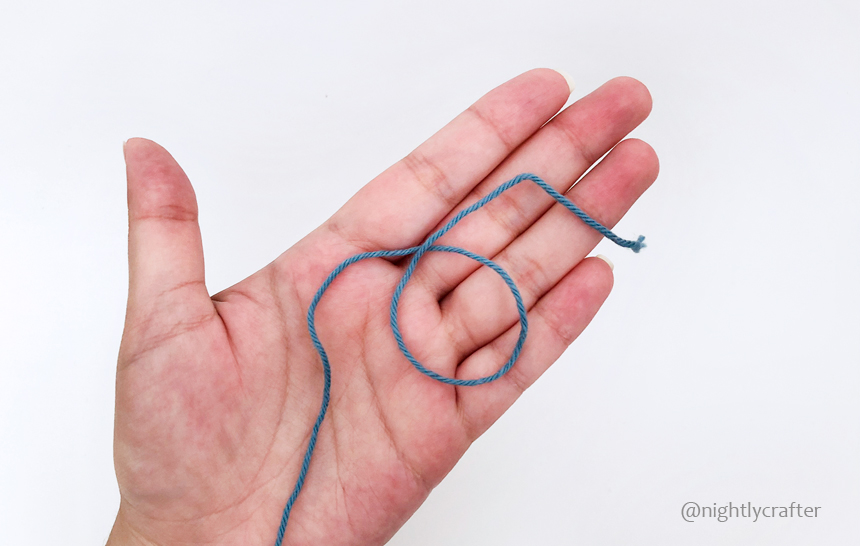
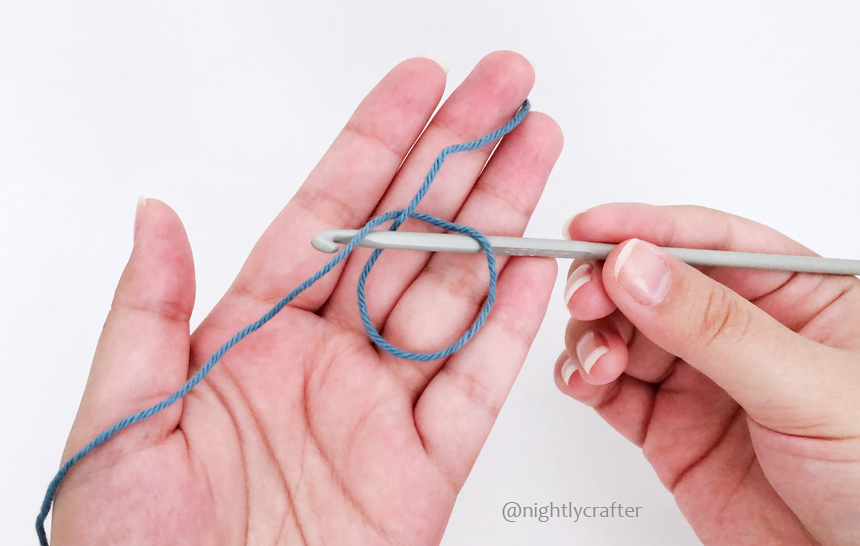
To start, take the tail of your yarn and make a loop in your hand. Be sure that the tail end of the yarn is on top of your loop.
* Be careful of not doing it to close to the end. I did it close to the end so you can notice the difference between the main yarn and the tail end.
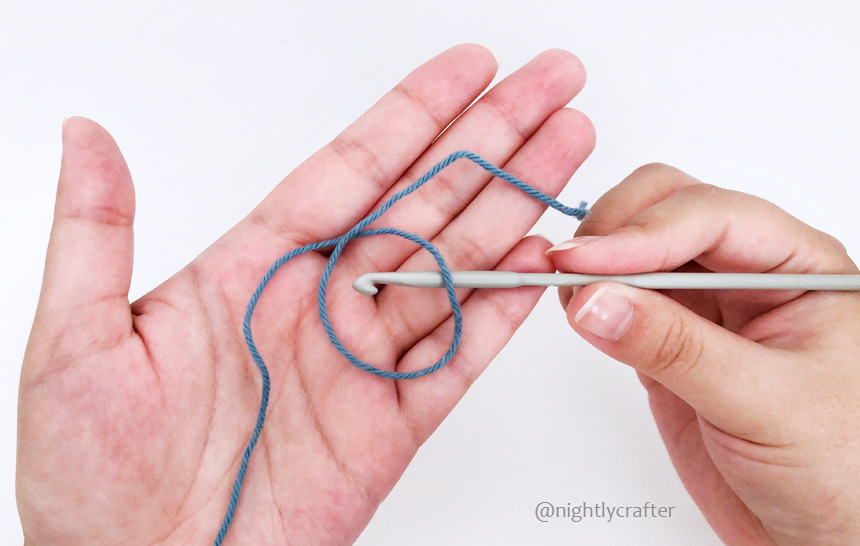
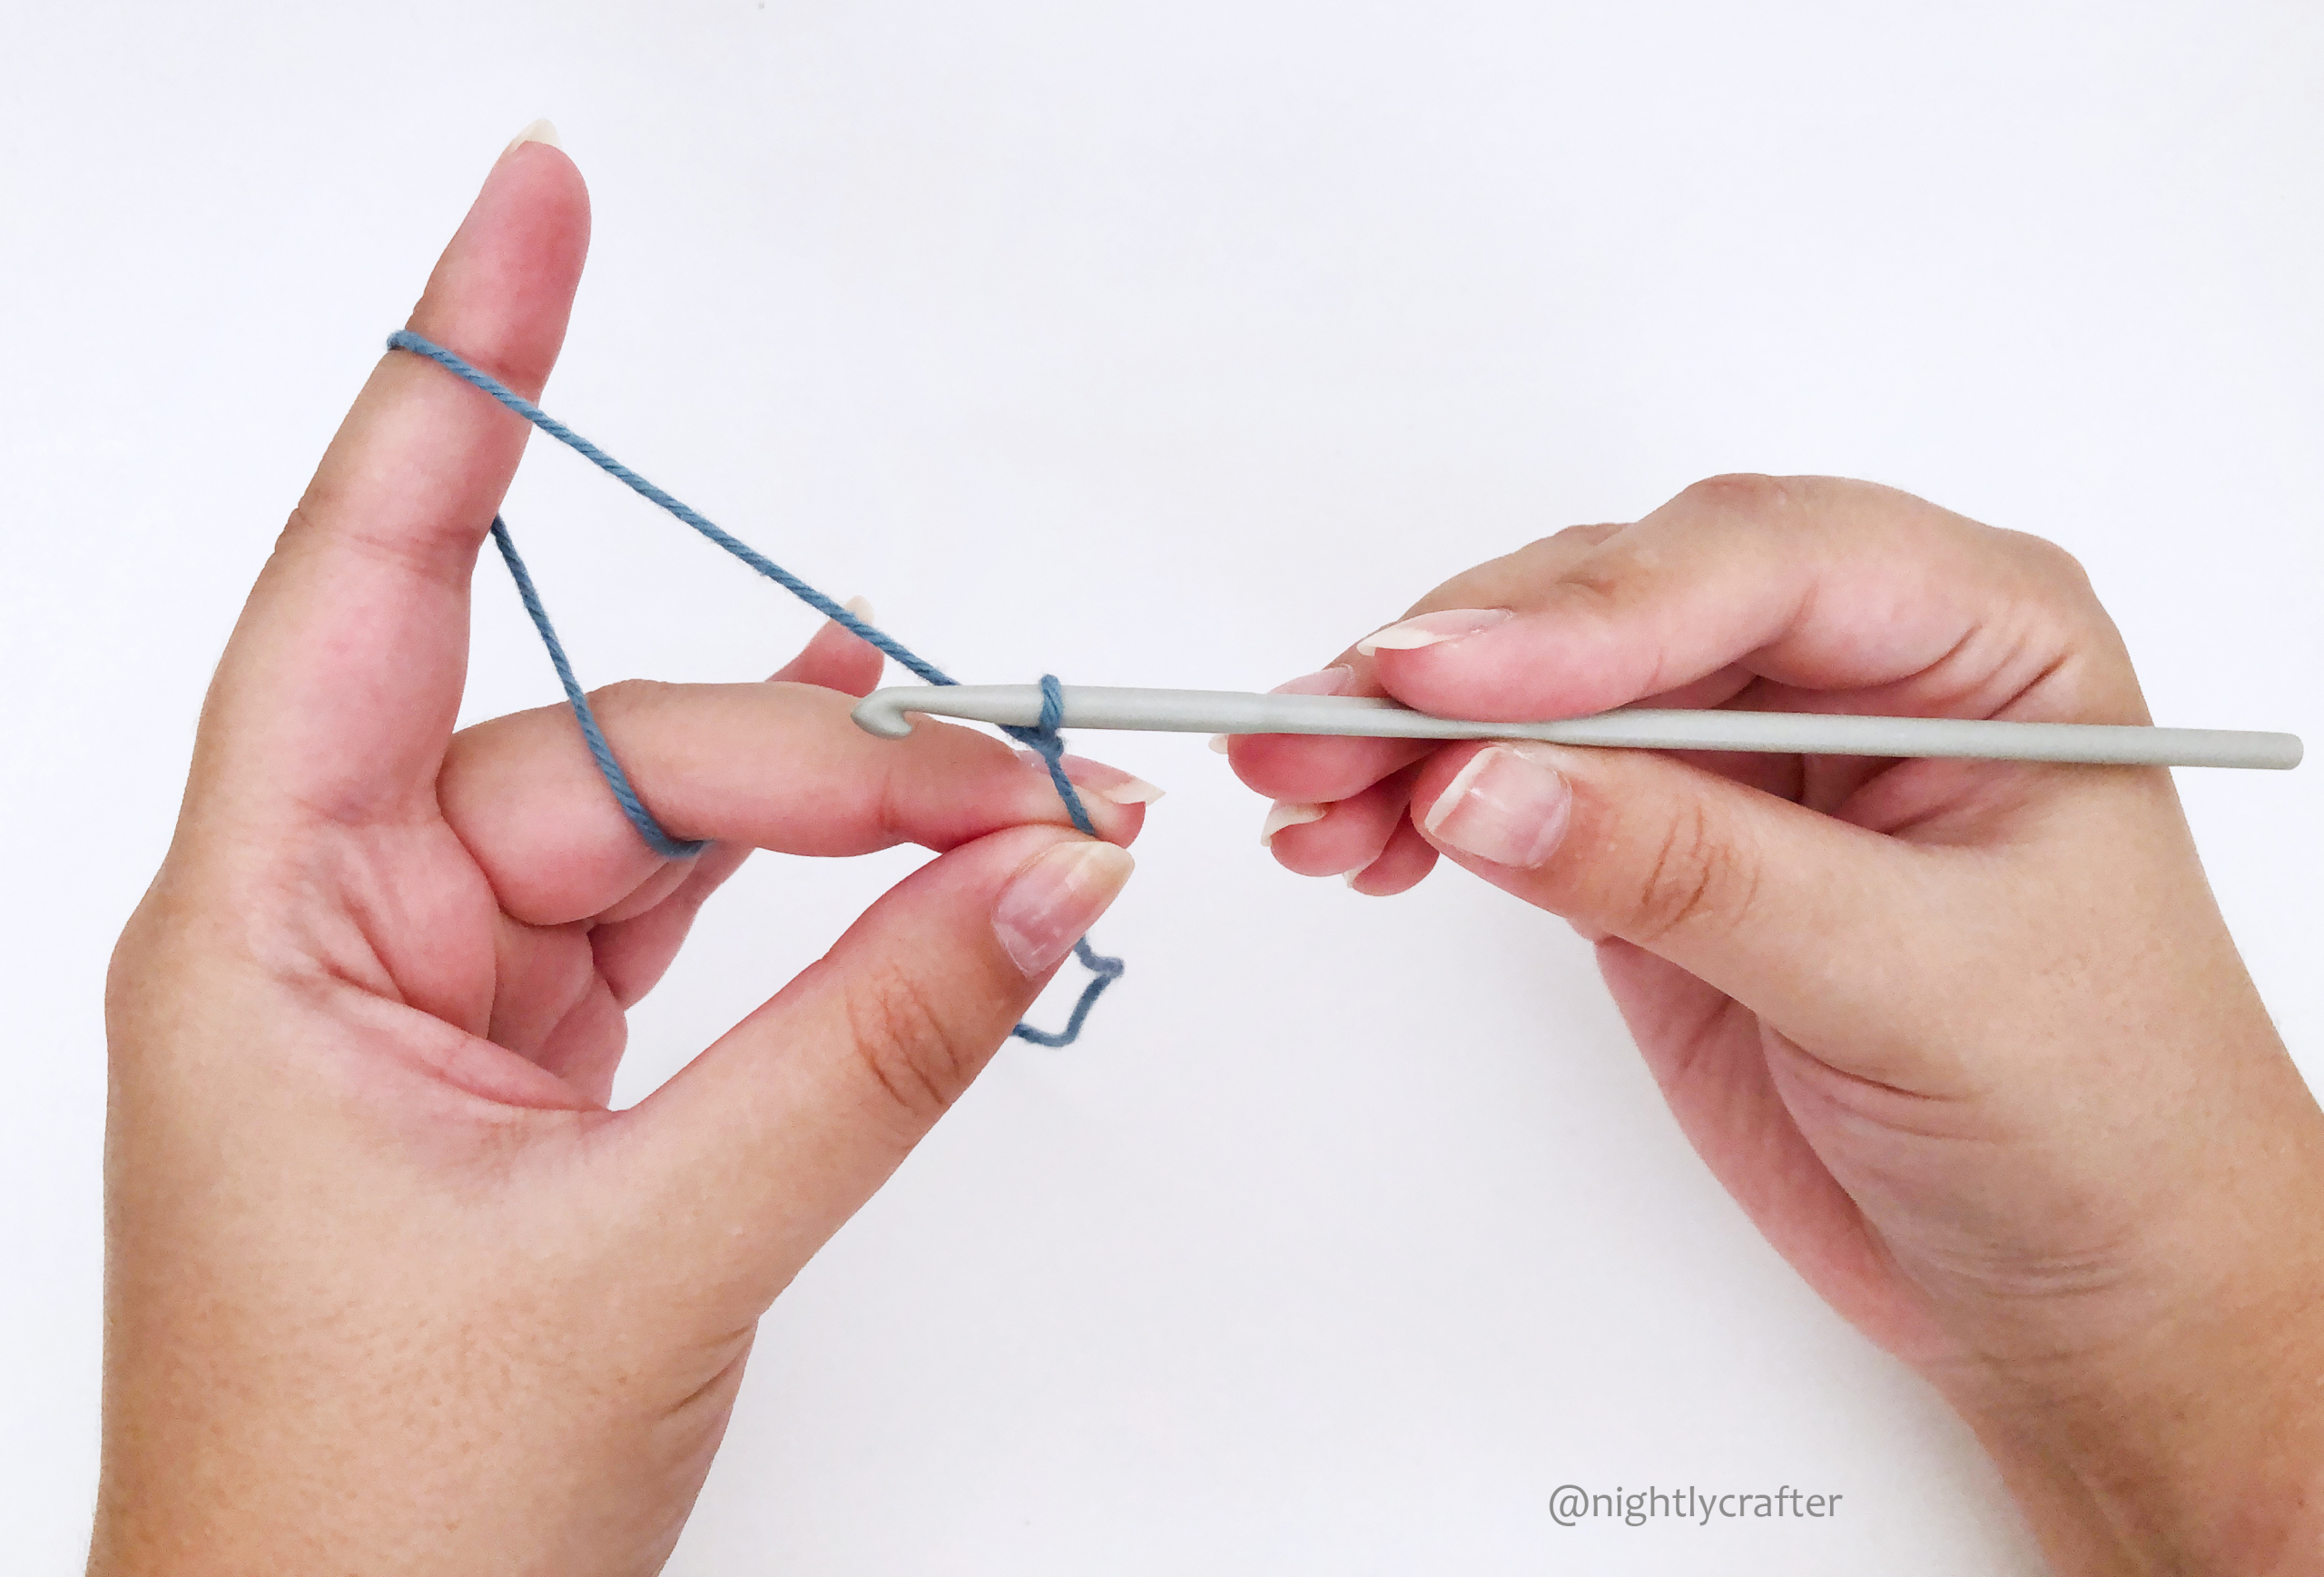
Insert your crochet hook through the center of the loop in direction of the main yarn, passing behind the first thread and on top of the second.
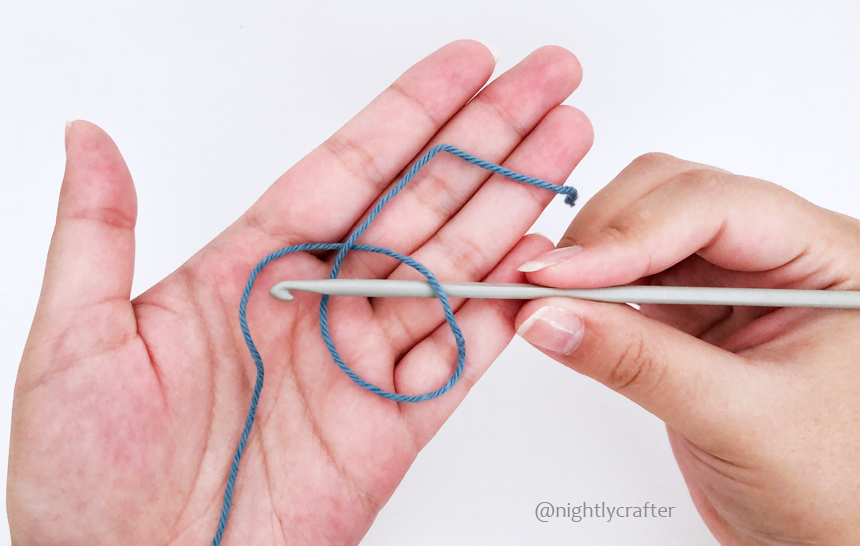
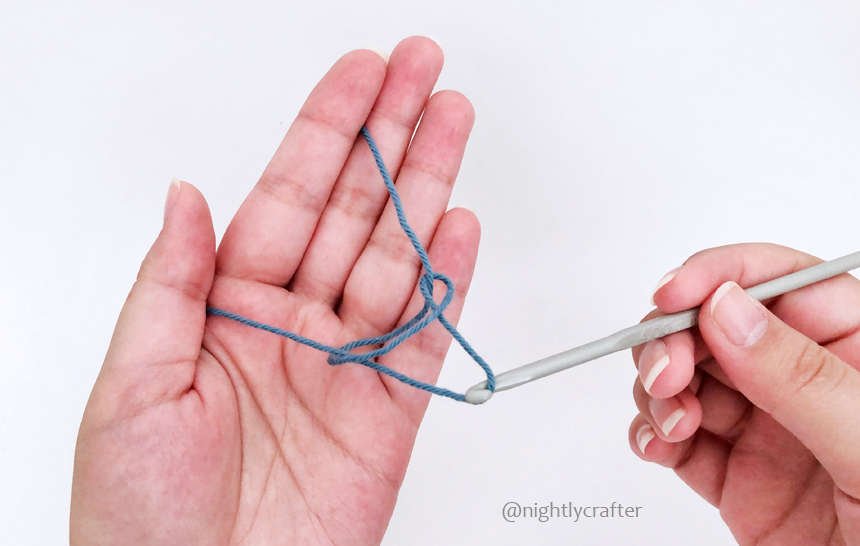
Hook the main thread and pull it out through the loop, following the same path that you just did but backward. Don’t forget to hold BOTH threads (the main yarn and the tail) while you’re pulling.
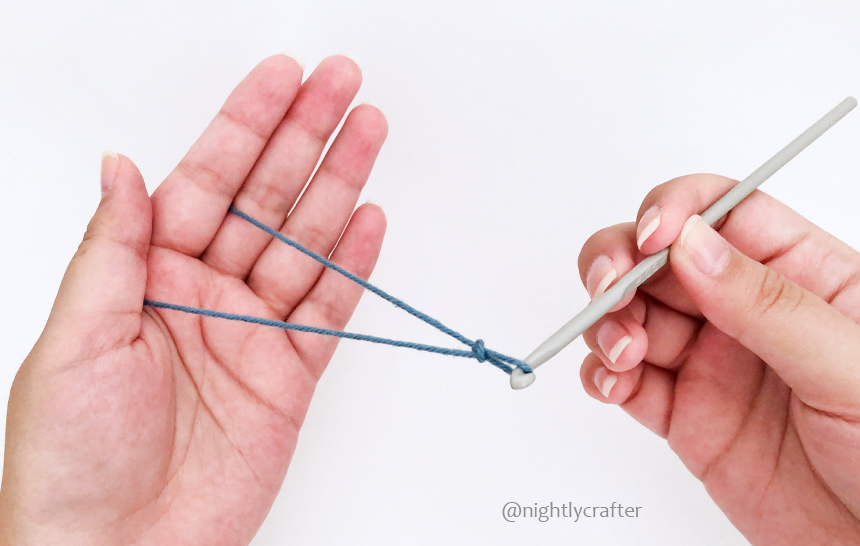
Finally, drop the tail end and pull the yarn to adjust the knot to your crochet hook. And done!
Be careful not to tighten it too much. The knot should be tight enough to be completely closed but loose enough to be able to move it thru your hook.
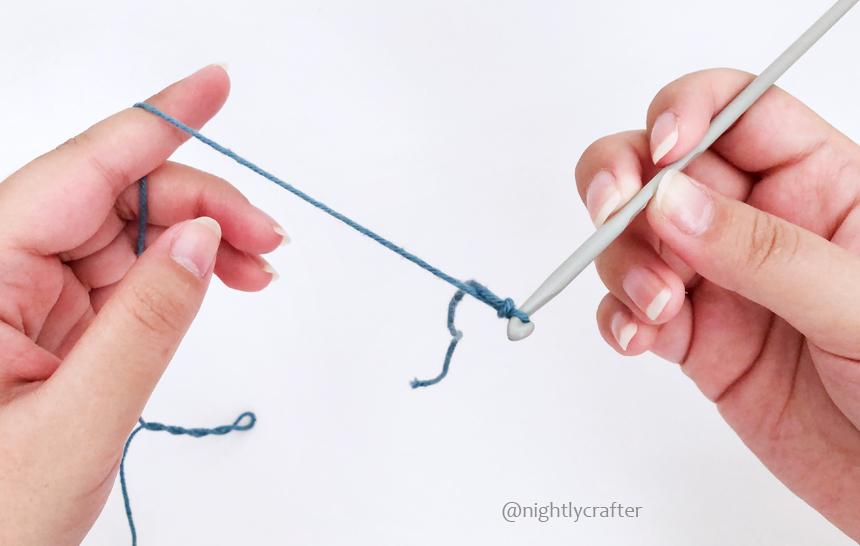
Now, you are ready to start crocheting!
I hope it has been clear and helpful to you, and remember, if you have any questions about this topic or any suggestion for a new one, PLEASE write me a comment below or send me an email, and I’ll answer you happily.
Also, don’t forget to follow me on Instagram (@nightlycrafter) to see my daily projects.
Happy Crocheting!
Paula.
NEXT IN CROCHET FOR BEGINNERS
You have a slip knot ready to start in your crochet hook, so it is time for the next step: HOW TO CROCHET A CHAIN STITCH.
Leave a Reply